Mastering SSH Access to Devices Behind Routers Using Reverse Tunneling Techniques
Forget traditional port forwarding—discover how reverse SSH tunneling flips the script on accessing devices behind routers, unlocking seamless and secure remote connections even in the toughest network environments.
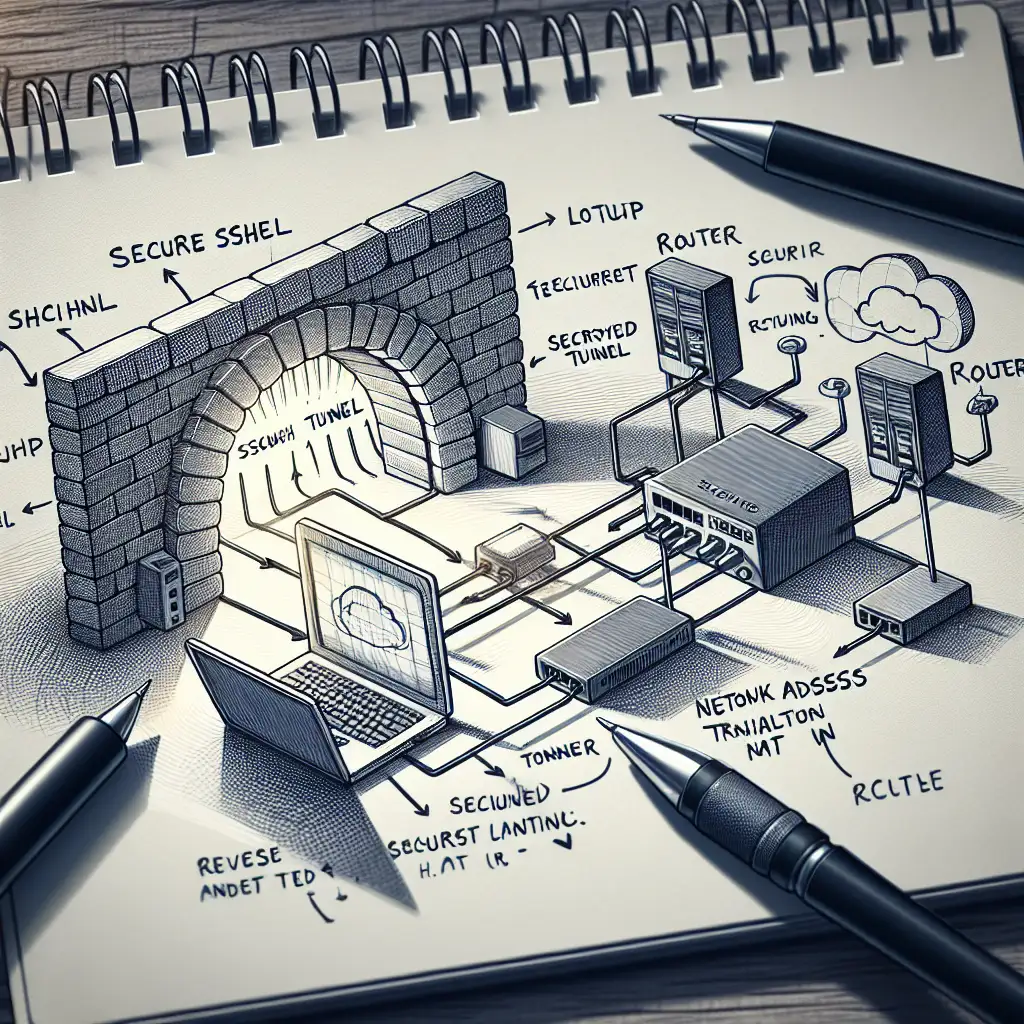
For IT professionals and tech enthusiasts alike, accessing devices hidden behind routers can be a daunting challenge. Network Address Translation (NAT), firewalls, and ISP restrictions often block direct inbound connections. Traditionally, port forwarding has been the go-to solution, but it requires access to router settings and sometimes involves security risks or complex network reconfiguration.
Enter reverse SSH tunneling — a practical, secure technique that turns the problem inside out. Instead of trying to poke a hole into a protected network, the device behind the router creates an outbound SSH connection to a publicly accessible server you control. This connection then acts as a secure bridge back to your device whenever you need it.
In this post, I’ll walk you through why reverse SSH tunnels are game-changers for remote device management and provide clear step-by-step examples so you can implement them yourself effortlessly.
Why Reverse SSH Tunneling?
- Bypass NAT/firewall limitations: NAT generally blocks unsolicited inbound connections. Because your device initiates the connection outwards, firewalls usually allow it.
- No router changes required: No access needed to router configuration or ISP involvement.
- Secure communication: SSH uses strong encryption ensuring confidentiality and integrity.
- Works across multiple network setups: Home networks, corporate firewalls, even mobile hotspots.
How Reverse SSH Tunnel Works — The Concept
- Your local device (behind NAT/router) initiates an SSH connection to a public server (jump server or VPS).
- When initiating the connection, your device requests that the public server open a listening port.
- Later, from your own workstation (or anywhere), you connect to that public server on the listening port.
- Traffic received here is forwarded through the established tunnel back down to your local device’s SSH service — even though it’s behind NAT/firewall.
It’s like the device “calls home” first and keeps an open channel alive for you to dial in securely anytime.
Requirements Before You Start
- A public-facing SSH server with a fixed IP or domain (commonly called your jump server). Think of DigitalOcean, AWS EC2, Linode VPS or even a home server with port forwarding enabled.
- SSH access credentials for both your device behind the router and jump server.
- Basic familiarity with command-line SSH usage.
Setting Up Reverse SSH Tunneling Step-by-Step
Scenario:
- Device behind router:
device.local(private IP: e.g., 192.168.x.x) - Public jump server:
jump.example.com - Your local admin PC: Anywhere with internet access
Step 1 — Initiate The Reverse Tunnel From The Device
Run this command on your device behind NAT, which creates an outgoing tunnel to jump.example.com:
ssh -N -R 2222:localhost:22 user@jump.example.com
Explanation:
-Nmeans no remote commands are executed; just tunnels established.-R 2222:localhost:22tells jump.example.com to listen on its port 2222 and forward that traffic into port 22 (SSH) on your local device.user@jump.example.comssh login to jump server.
Now, as long as this session is active (you may want to use tools like autossh for persistence), your jump server will have port 2222 forwarding back securely.
Tip: Choose an unused high-numbered port on the jump server (e.g., above 1024) so no root privileges are needed.
Step 2 — Connect From Your Admin PC To The Device Via Jump Server
From any machine with internet access simply execute:
ssh -p 2222 user@jump.example.com
This command actually tunnels through jump.example.com on port 2222 and reaches the SSH daemon running on your device behind NAT!
You’re directly connected as if you were on the local network—even though physically your machine is elsewhere on the internet.
Automating Persistent Tunnels with autossh
Manual sessions may drop if network connectivity fluctuates. To maintain stable tunnels over time:
autossh -M 0 -f -N -o "ServerAliveInterval 30" -o "ServerAliveCountMax 3" -R 2222:localhost:22 user@jump.example.com
autosshmonitors and restarts dropped connections automatically.-fruns tunnel in background.- Keep this running on your target device via systemd service or cron job for extra robustness.
Handling Multiple Devices & Ports
What if you want tunnels for several devices?
Simply repeat with different remote ports:
| Device | Tunnel Port on Jump Server |
|---|---|
| device1.local | 2222 |
| device2.local | 2223 |
Connect accordingly by specifying correct ports when logging in via jump host:
ssh -p 2223 user@jump.example.com
Security Considerations
-
Limit which users can forward ports by editing
/etc/ssh/sshd_configentries:GatewayPorts yes AllowTcpForwarding yes -
Use strong authentication methods (at least key-based auth) for both jumps and target devices.
-
Restrict firewall rules on your jump servers — only expose ports necessary for tunneling.
Troubleshooting Tips
- Confirm firewall isn’t blocking chosen remote ports (
ufw,iptables, cloud security groups). - Verify remote bind address allows listening on all interfaces (
GatewayPorts yes). - Use verbose ssh debugging mode:
ssh -vvv -N -R ...
looking for detailed error diagnostics.
Final Thoughts
Reverse SSH tunneling is an elegant yet underused technique that dramatically simplifies managing devices buried deep behind routers and NATs without juggling firewall configs and router admin panels.
By leveraging outbound SSH initiated tunnels toward trusted servers under your control, IT professionals can regain seamless remote access while keeping networks securely locked down from unauthorized inbound traffic.
Give it a try today—you might never go back to traditional port forwarding again!
Have questions? Want me to cover setup with specific routers/devices? Drop me a comment below!